MNIST Machine Learning (ML) and Deep ML using Tensorflow
References:
MNIST is a simple computer vision dataset. It consists of images of handwritten digits like these:

The MNIST data is split into three parts:
- 55,000 data points of training data (
mnist.train), - 10,000 points of test data (
mnist.test), - 5,000 points of validation data (
mnist.validation).
This split is very important: it's of course essential in ML that we have separate data which we don't learn from so that we can make sure that what we've learned actually generalizes!
Each image is 28 pixels by 28 pixels. We can interpret this as a big array of numbers:
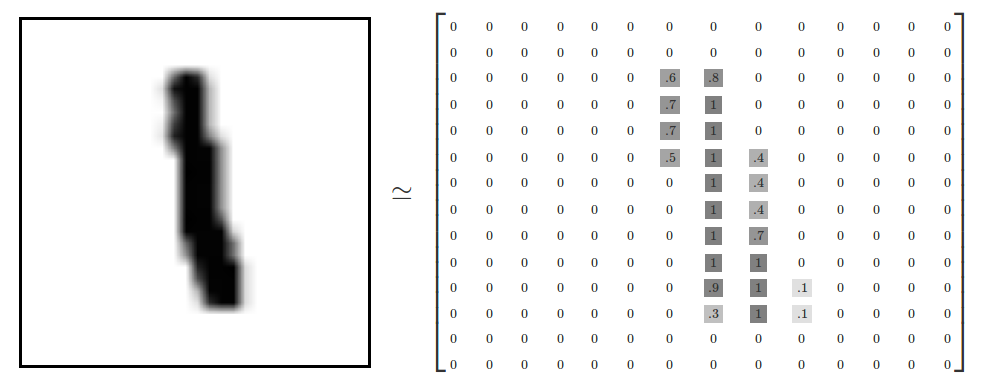
Thus after flattening the image into vectors of 28*28=784, we obtain as mnist.train.images a tensor (an n-dimensional array) with a shape of [55000, 784].
Objective
MNIST images is of a handwritten digit between zero and nine. So there are only ten possible things that a given image can be. In this hands-on, we will design two classifiers for MNIST images:
- A very simple MNIST classifier, able to reach an accuracy of around 92% -- see Jupyter notebook
mnist-1-simple.ipynb - A more advanced deep MNIST classifier using convolutional layers, which will reach an accuracy of around 99.25%, which is way better than the previously obtained results (around 92%) -- see Jupyter Notebook
mnist-2-deep_convolutional_NN.ipynb
You can now run the jupyter notebook to open these files and proceed with the tutorial.
$> cd ~/git/github.com/Falkor/tutorials-BD-ML/docs/hands-on/tensorflow
$> jupyter notebook

# Now open the appropriate notebook
#  1. mnist-1-simple.ipynb
#  2. mnist-2-deep_convolutional_NN.ipynb